Chair yoga exercises can be a practical place to begin if you’d like to explore yoga while staying seated. A steady chair supports your practice as you move, breathe and notice what feels comfortable. You can try the movements below one at a time, pause between them, and leave out anything that doesn’t suit you today.
This guide brings together six seated practices drawn from my chair yoga teaching. Start with the setup, then explore the movements at your own pace. You won’t need to get down onto the floor.
What is chair yoga
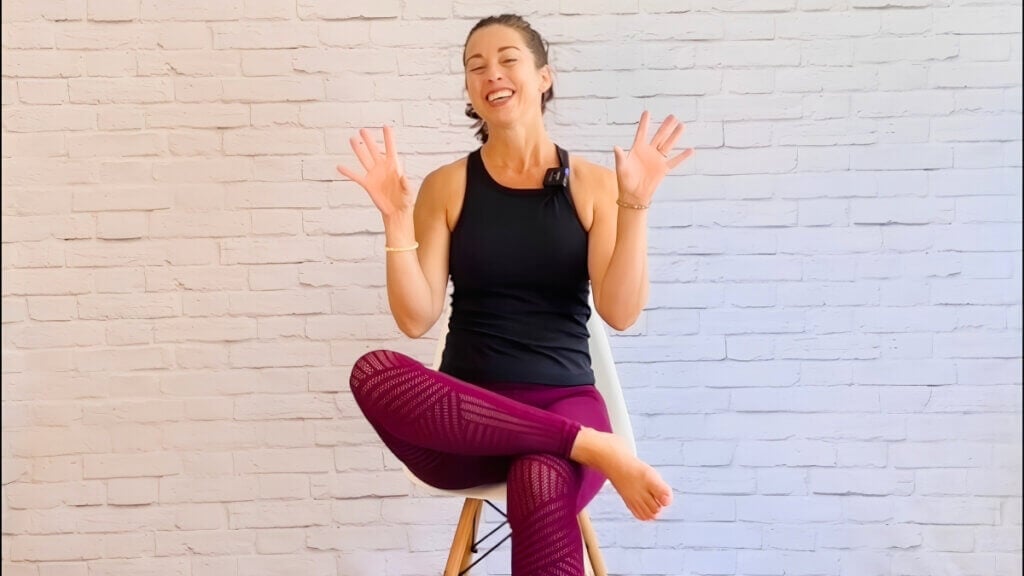
Chair yoga uses a chair to support yoga poses and movements. Some practices are entirely seated; others include standing while using the chair for support. The exercises in this guide stay seated, with time to settle before and after moving.
The chair is part of the setup. Your attention matters too. Can you feel your feet underneath you? Are you holding your breath? Would moving a little less feel more comfortable? These simple questions give you something useful to work with as you practise.
Set up your chair
Use a sturdy chair without wheels, placed on a surface where it won’t slide. An armless chair gives your arms more room to move. Clear enough space around you that you can move without bumping into a desk or other furniture.
Sit where you feel steady. Moving towards the front of the seat can give you room to move your spine; staying closer to the backrest may offer support you prefer. Keep both feet supported. If they don’t comfortably reach the floor, place firm yoga blocks underneath them. If your knees sit much higher than your hips, a securely folded blanket on the seat may help you find a more comfortable height.
Take a moment to adjust before you begin. You should be able to breathe comfortably without working hard to hold yourself upright.
If you have an injury or a health condition that affects movement, ask a qualified healthcare professional which activities are appropriate for you. A qualified yoga teacher can help you explore options. Stop if you feel pain, dizziness, tingling or difficulty breathing. The NCCIH guide to yoga safety offers further general guidance.
1. Seated Mountain
Begin with your feet resting evenly on the floor or blocks and your hands on your thighs. Notice the weight through both sides of your pelvis. Make any small adjustments you need to feel settled.
Sit tall without pulling your shoulders back or pushing your chest forward. Think about making space across both your collarbones and your upper back. Let your shoulders rest.
Stay for a few comfortable breaths. Notice where you feel supported and where you might be using more effort than you need. You can return to this simple seated position between the other exercises.
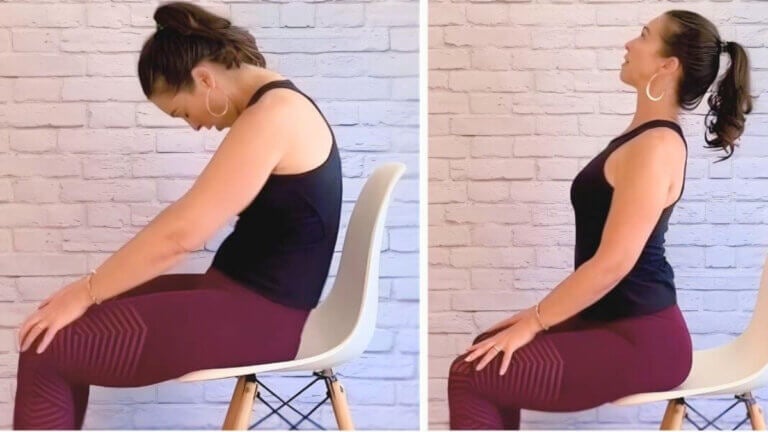
2. Seated Cat–Cow
Rest your hands on your thighs. As you inhale, gently tip your pelvis forwards, lift your chest and allow a small arch through your back. Let your gaze lift only as far as your neck feels comfortable.
As you exhale, tip your pelvis back, let your back round and allow your chin to lower. Your hands can stay on your thighs as you move between these two shapes.
Try a few slow rounds, then come back to an upright seat. Begin with a small movement so you can notice what changes through your pelvis and spine. If matching the movement to your breath feels awkward, keep breathing naturally and move at a pace you can follow comfortably.
3. Comfortable arm raises
From your upright seat, let your arms rest beside you or place your hands on your thighs. Slowly raise your arms forwards and upwards, stopping at a height that feels comfortable. Your hands might reach overhead, or they might stay much lower.
Notice whether you can keep your breath easy as your arms move. Slowly lower them and pause. If it feels useful, explore another gentle raise and lower.
You can bend your elbows, make the movement smaller or leave your hands resting. There’s no particular height to reach. Pay attention to the option that allows you to move without straining.
4. Toe lifts and spreading
Bring your attention back to your feet. With your heels and the balls of your feet resting on their support, try lifting all your toes. Spread them gently, then lower them again.
You can repeat that simple movement. If you’d like to explore something different, try lifting only your big toes while the other toes stay down, then lower them.
Moving toes independently can feel unfamiliar. Let it be an experiment. If they all move together, or barely move, notice that and return your feet to rest. Avoid gripping or forcing the movement.
5. A gentle seated twist
Keep your feet supported. If it’s comfortable, move them a little wider and let your knees point in the same direction as your toes, creating a seated Goddess shape. You can keep a narrower position if that feels steadier.
Sit tall and let your hands rest lightly on your thighs. As you exhale, gently turn your chest towards the right. Let your head follow only as far as your neck feels comfortable. Inhale as you return to centre.
Try the same movement to the left, then return to centre. Keep the turn small enough that you can stay steady in your chair and breathe easily. Your hands are resting rather than pulling you further into the twist.
After exploring both sides, pause with your hands on your thighs. If twisting doesn’t suit you, stay in Seated Mountain and notice your breathing instead.
6. Seated rest
To finish, settle into a comfortable position with your back supported by the chair and your feet supported below you. Let your hands rest wherever they feel at ease.
You can keep your eyes open with a soft gaze or close them if that feels comfortable. Allow your breathing to find its own rhythm. Take a little time here before deciding what you’d like to do next.
Make the practice your own
You don’t have to complete all six exercises. You might begin with Seated Mountain and Cat–Cow, then finish with seated rest. On another day, you might explore the arm or foot movements as well.
Pause between exercises and ask yourself a simple question: would I like to continue, change something or stop? That answer may be different from one practice to the next.
Try a full chair yoga class
When you’d like a longer guided practice, try my Full Body Chair Yoga for Beginners and Seniors class. This 53:55 class includes seated movement, additional exercises and optional standing work. Choose the options that suit you and pause whenever you need.
If you’d like to practise with me, join my online chair yoga classes. I’ll guide you through the movements and offer options along the way.
More chair yoga resources
- Yoga at Your Desk: a workplace-focused sequence and printable for movement during the working day.
- Yoga for Disability: a starting point for disability-specific adaptations to discuss with an appropriately qualified teacher.
- Chair Yoga Teacher Training: for teachers who want to study chair-supported practice in more depth.