Set up for standing chair yoga
Use a sturdy, armless chair without wheels. Check that it will not slide, fold or tip when you put your hands on it. Place it on a yoga mat or against a wall to help keep it from sliding. Clear enough space to step behind and beside it, and check the chair again whenever you reposition it.
These poses involve standing and changing your foot position while using the chair for support. If that does not feel steady, choose a seated practice or work with a qualified teacher who can help you find an appropriate setup. My chair yoga exercises for beginners guide stays seated throughout.
Let comfort guide the size of each movement. You should be able to breathe without straining. Stop if you feel pain, dizziness, tingling or difficulty breathing. If you have an injury or a health condition that affects movement, ask a qualified healthcare professional which activities are appropriate for you. The NCCIH guide to yoga safety has further general guidance.
1. Downward Dog with a Chair
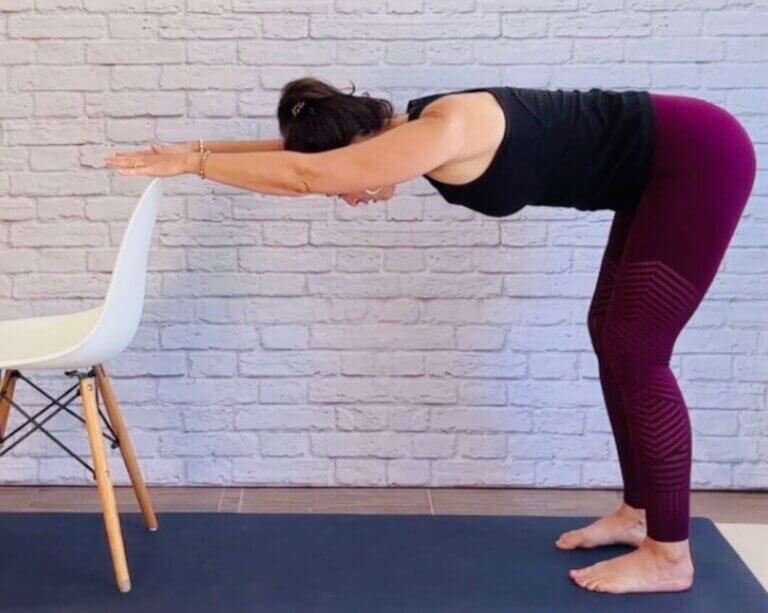
A chair gives your hands a raised support for Downward Dog. With your hands on the backrest, you can explore the forward hinge while keeping your hands well above the floor.
For the backrest-supported version, stand behind the chair with your hands on top of the backrest and your feet roughly hip-width apart. Walk your feet back and fold at your hips, moving towards an L shape. You do not need to reach an exact angle. Bend your knees if that helps you keep length through your spine.
Avoid pushing your chest down so far that you arch strongly through your lower back or sink into your shoulders. Keep the movement small enough to stay comfortable, and continue breathing.
When you are ready to finish, come back towards the chair and return upright slowly. Pause before deciding whether to continue.
2. Pyramid Pose with Chair Support
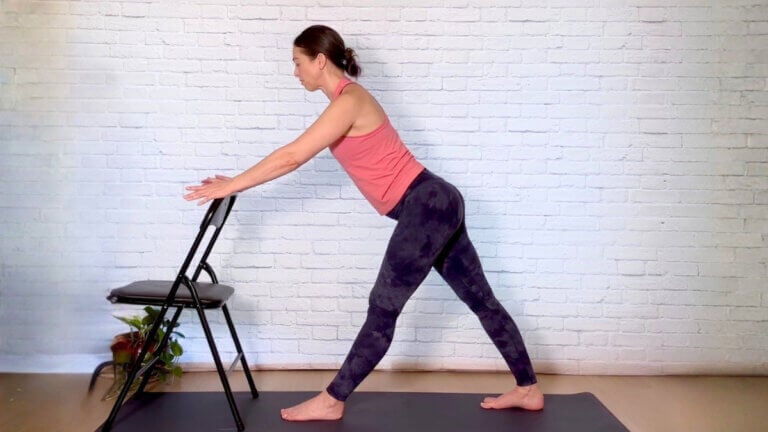
Pyramid Pose, or Parsvottanasana, brings a forward fold into a split stance. The chair gives you somewhere to rest your hands without reaching towards the floor.
For the variation shown, face the back of the chair with one foot forward and the other behind you. Place both hands on the backrest. Keep your torso facing the chair as you fold forward from your hips, only as far as feels comfortable.
The photograph shows a modest forward hinge. You can stay with that small movement rather than trying to bring your chest down towards your front leg. Come back upright before changing your feet and exploring the other side.
Pyramid can also be practised with the hands on the chair seat, but the backrest-supported version shown here keeps the hand support higher. Choose the support and amount of movement that allow you to remain steady.
3. Triangle Pose with Chair Support
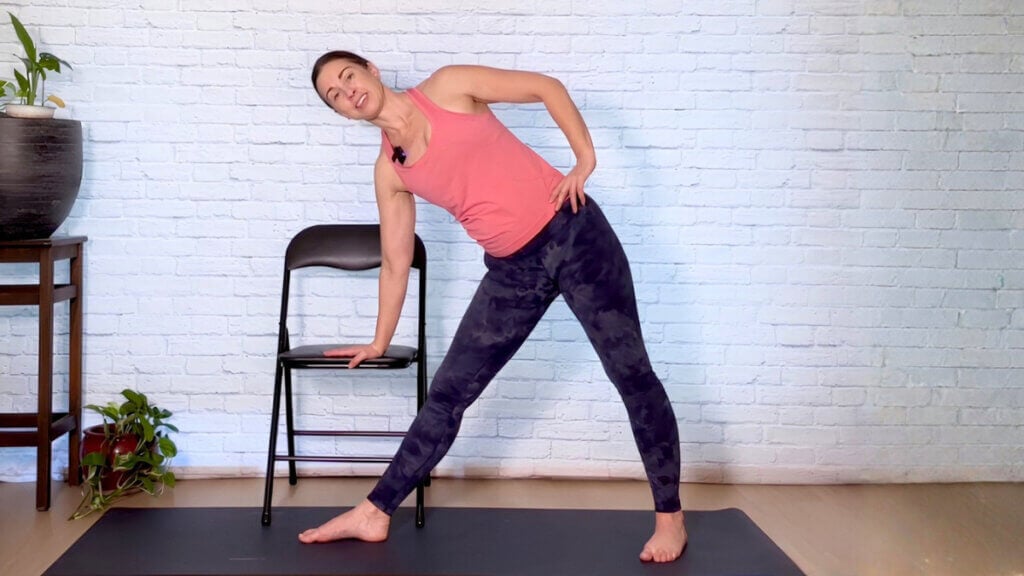
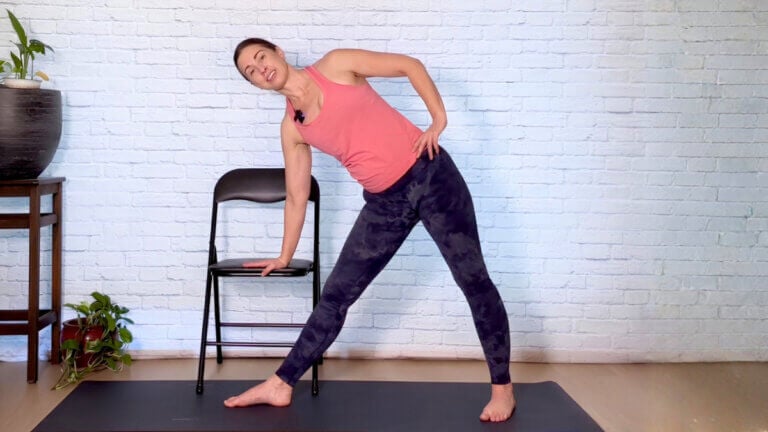
Triangle Pose, or Trikonasana, uses a wider stance and a sideways hinge towards the leading leg. Here, the seat supports your lower hand.
Stand beside the chair with your feet apart and the leading leg turned towards the chair, as shown. Hinge towards that straight leg and bring your lower hand to the seat. The upper hand can stay on your hip; you do not have to raise it overhead.
Keep the movement within a range where the hand support is comfortably available. If reaching the seat makes you strain or feel unsteady, come upright and leave this variation out. A qualified teacher can help you explore a different setup.
Return upright before moving the chair or changing sides. Recheck that the chair is secure, then explore the second side. Notice how the two sides feel without trying to make them look identical.
4. Standing Side Bend with a Chair
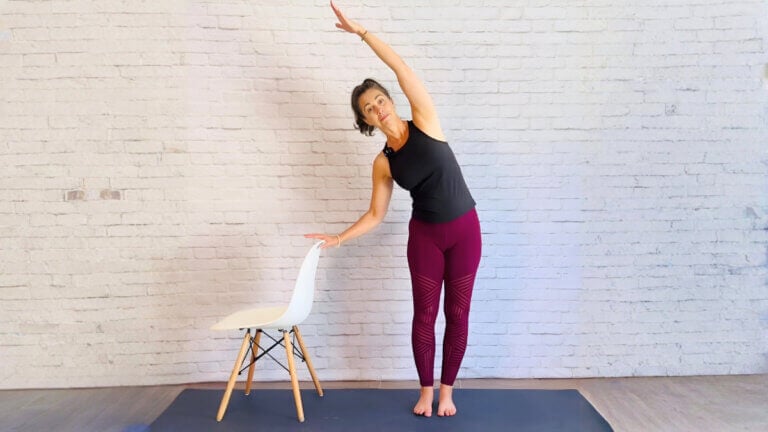
This standing side bend is also called Crescent Moon or Standing Half Moon. The chair gives one hand a place to rest while the other arm reaches up.
Stand beside the chair with your nearest hand resting on the backrest. Keep both feet on the floor. Raise the other arm to a comfortable height, lengthen upwards and gently side bend towards the chair.
You might stay for two or three comfortable breaths, then return upright and lower your arm. Turn around or reposition the chair so you can try the other side with the same support.
The photograph shows both feet uncrossed. Keep that straightforward setup as you explore the movement, and make the side bend smaller if reaching overhead or leaning further feels strained.
Choose your practice
You do not need to complete all four poses. Begin with the setup you feel most comfortable using, pause after the movement and decide whether you would like to continue. When you try a one-sided pose, give yourself time to explore both sides.
Let the chair support the practice you need today. You can make a movement smaller, return to standing or sit down to rest. Keep checking that you feel steady and can breathe comfortably.
Try a chair-supported Sun Salutation
In this short chair-supported Sun Salutation, I link breath with movement through forward folds, Downward Dog, plank, Upward Dog and lunges. The flow uses the chair seat for Downward Dog, so the hand support is lower than in the backrest-supported stretch above.
This is an optional, more active practice to explore when you feel steady and comfortable with the movements. Watch first, use the options I offer and pause or leave out any movement that does not suit you. You can stay with the individual stretches above instead.
More chair yoga
- Online chair yoga classes: explore guided practice with me.
- Yoga at Your Desk: a workplace-focused sequence and printable.
- Chair Yoga Teacher Training: study chair-supported practice in more depth if you teach yoga.